
Going Further we should trigger worksoft Execution in Continuous Testing Manager (CTM), because Worksoft Execution Manager supports only in Internet Explorer(IE) and Microsoft announced that Internet Explorer will be no longer supported.
CTM gives you centralized control for running and monitoring remote tests on dedicated machines from a single interface. You can schedule and run Certify tests simultaneously across multiple machines, take screen shots of the process, and review process execution results.
CTM supports Worksoft Certify 12.0.2102.x and later versions in Automator’s mode only
Before you are able to execute a process remotely, you must have dedicated machines with Continuous Testing Manager (CTM) Agent installed and registered. When you install the Agent, the machine is automatically registered in CTM and appears in the Desktop Machines screen.
Once CTM instalation is done we can open CTM in browser using URL , After that we need to login using CTM Credentials
Once we login will get different tabs , they are
- Home
- Suites
- Executions
- Configuration
1. Home
This screen provides a summary of suites currently running, tests that are pending, andexecution results. Also, you can view the number of completed tests and suites
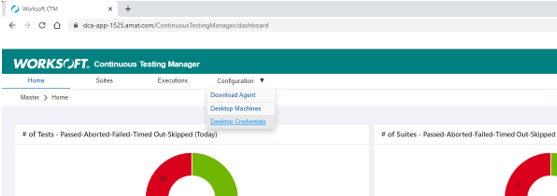
In order to trigger execution , we first need to start from configuration, In configuration tabthere are
- Download Agent
- Desktop Credentials
- Desktop Machine
- Download Agent
Click on Download Agent , CTM Agent will be download , so this agent needs to instal in server where worksoft Certify is installed to trigger execution
If the machine status is enabled, then the Agent is active. If the machine status is disabled, then the Agent is inactive.
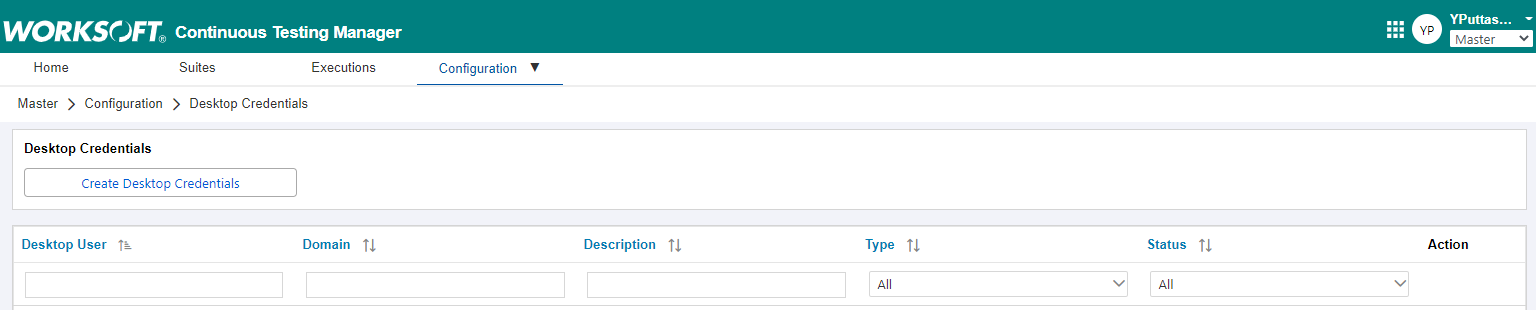
- Desktop Credentials
After Clicking Desktop Credentials , need to click on Create Desktop Credentials,
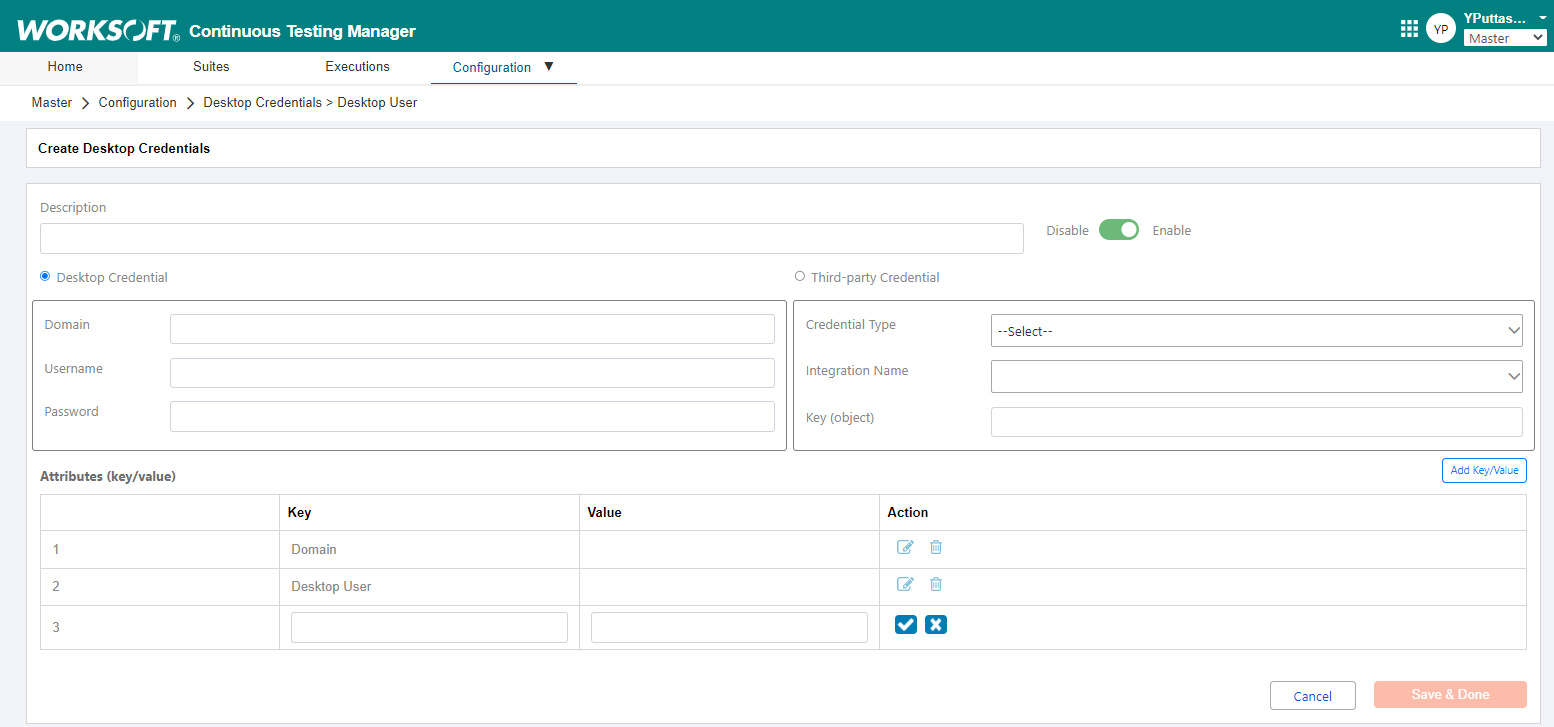
- Hereneeds to provide Description and by default Radio button will be in Desktop Credentials, Provide Domain, Username and Password of the RDP which has access for login.Credentails should be enabled
- If required can provide unique key and value in Attributes(Key/Value) section, So that same credentails can be used while creating Suites, if you have multiple login credentials.
- Once completed Click Save & Done Button.
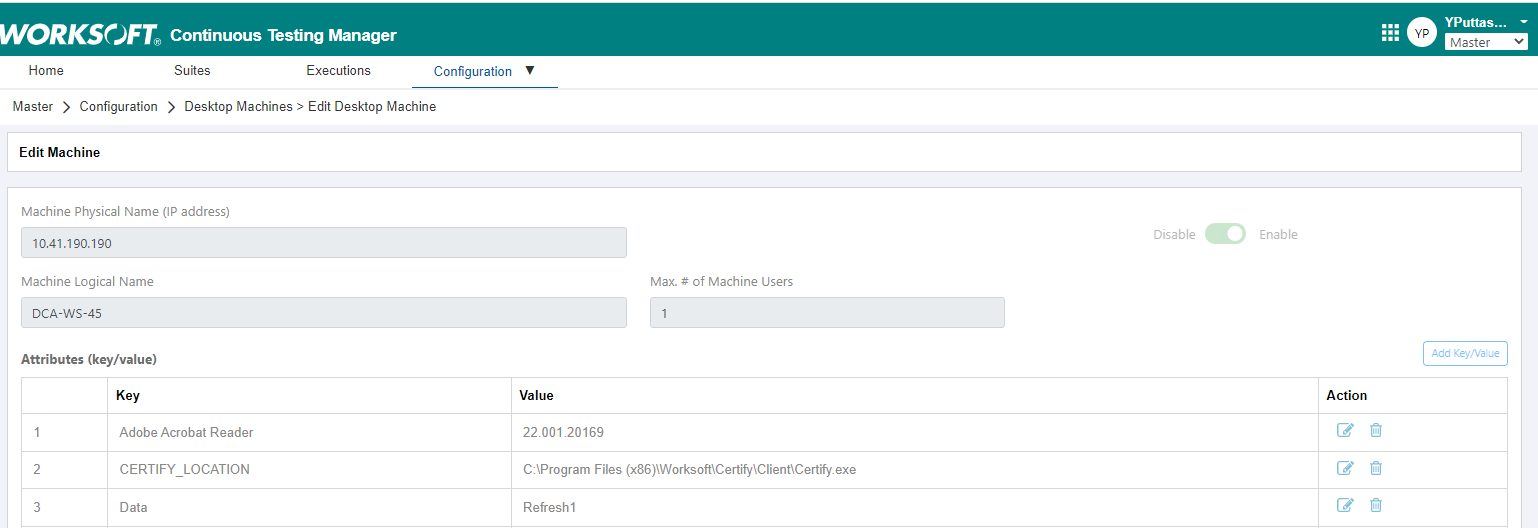
- Desktop Machine
After installing CTM Agent in server automatically Machine Name , Machine Logical Name and all server details will reflect in CTM.


After that needs to click on Edit button in Action column, Assign Desktop Credentials.
We can add Mulitple credentails to the machine and can select required credentails by adding key value pair while creating Suites.
Can add Key and value by using Add Key/Value button so this can be used while creatingsuites.Click on Save and Done button.Machine Status should be enabled, for triggering execution in required RDP.

- Suites
After you have added your desktop machines and created desktop credentials, you will now create Continuous Testing Manager (CTM) suites. A CTM suite is a Certify process or a group of Certify processes that you will schedule to execute on the CTM Agent.
To create a suite:
1.From the Continuous Testing Manager menu, click Suites.The Suites screen appears.

2.Click Create Suite button.The Create Suite screen opens.
3.In the Suite Name field, enter a unique name for the suite.
4.In the Tags field, enter tags that will help you filter suites by tags. Separate the tags with commas.
5.(Optional) In the Description field, enter a description for the suite.
The suite is now created. Next, you will select a source for your suite.
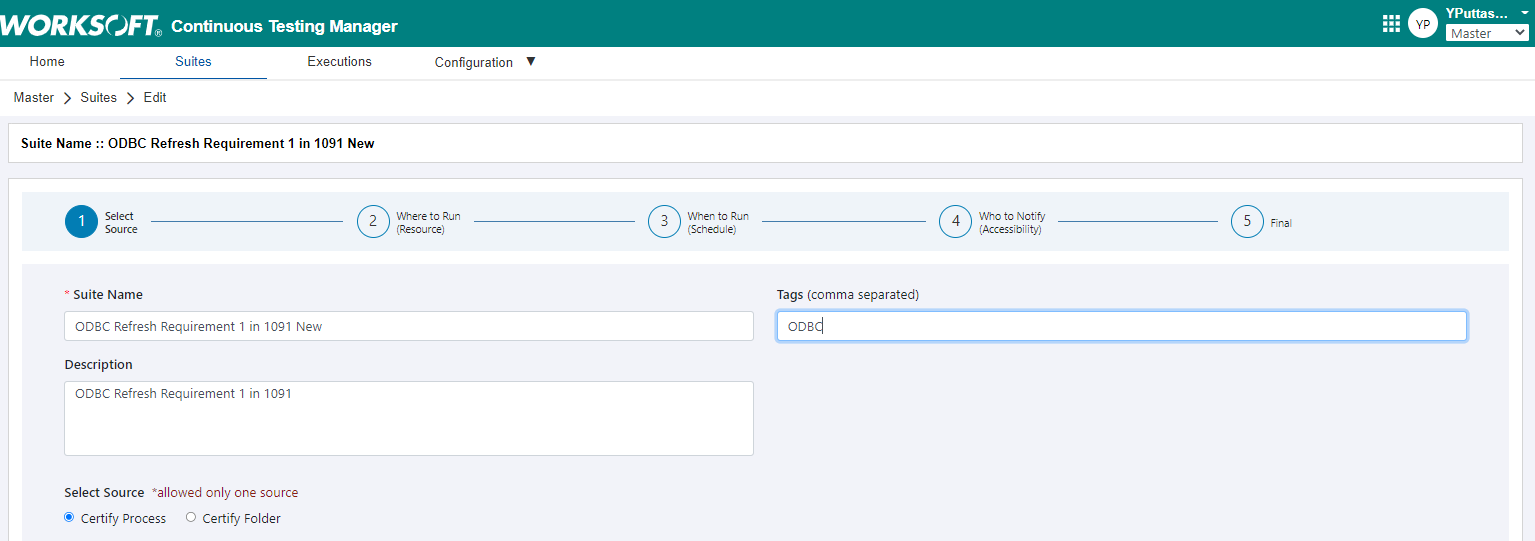
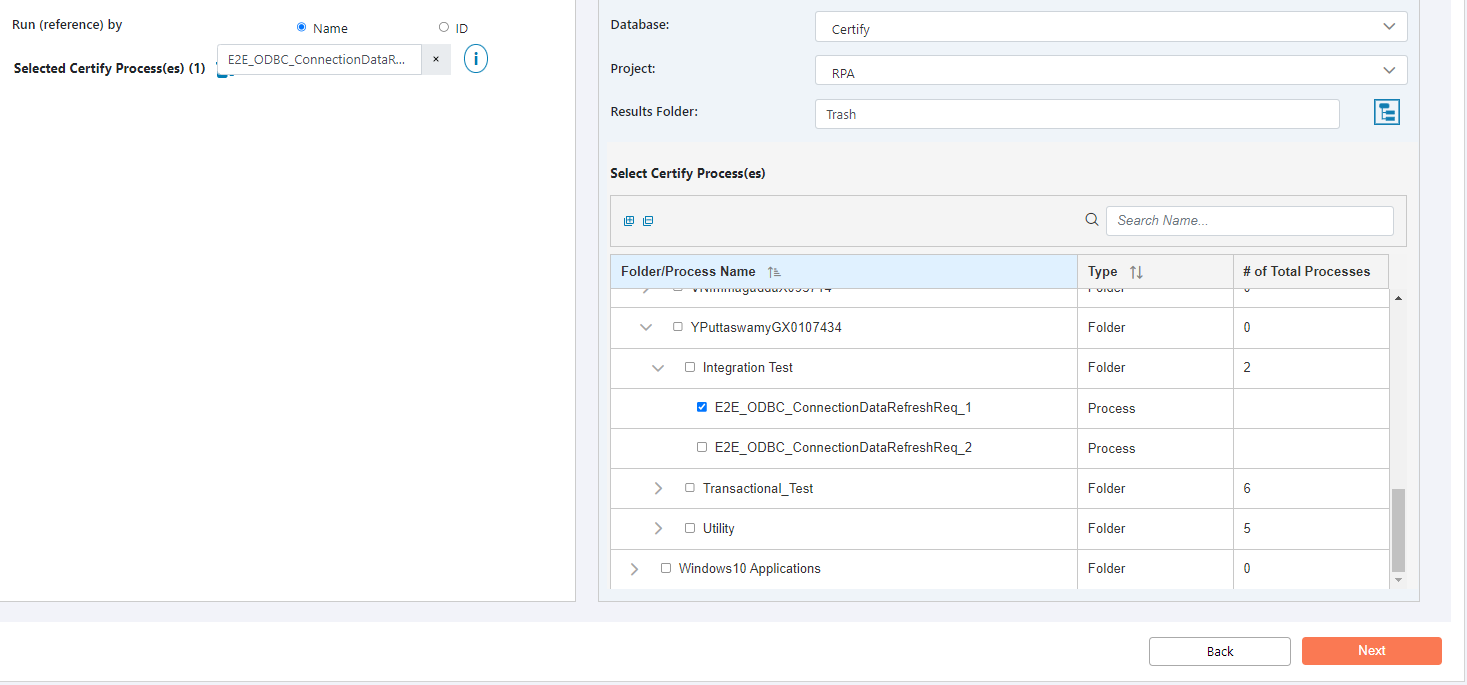
6.Now we can select a required process name to create a suite by Certify Process radio button checked
7.Now select required Database , Project field by selecting required Project.
8.Result Folder field for storing result in particular field.
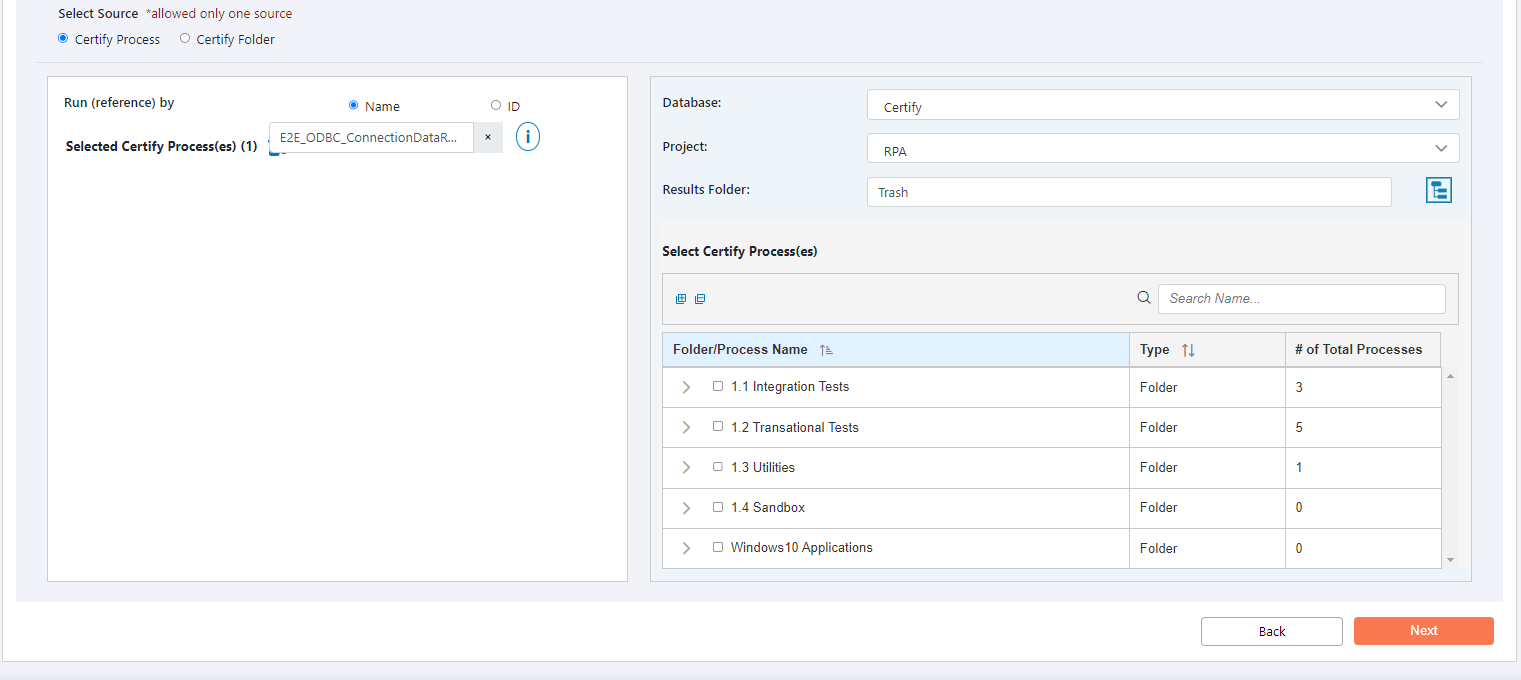
9.Process can be selected by navigating to required path by navaigating through tree structure and select checkbox so that process will be selected.Elsethrough Search field provided by giving process name as shown in below screenshot
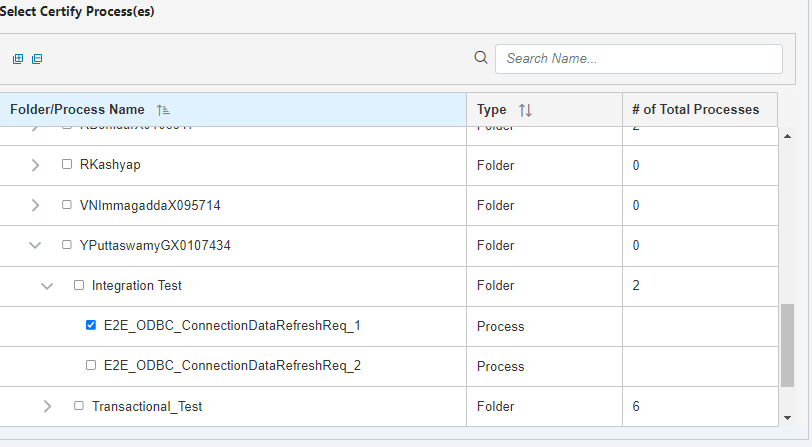
10.After Selecting the process it will automatically reflected in Selected Certify Process field.
After this click on Next Button
11.The next step is to select how to run the processes.
12.After you have clicked Next, the Execution Specification screen opens. If you need to go back to the previous page or click 1 select source on the Progress Bar
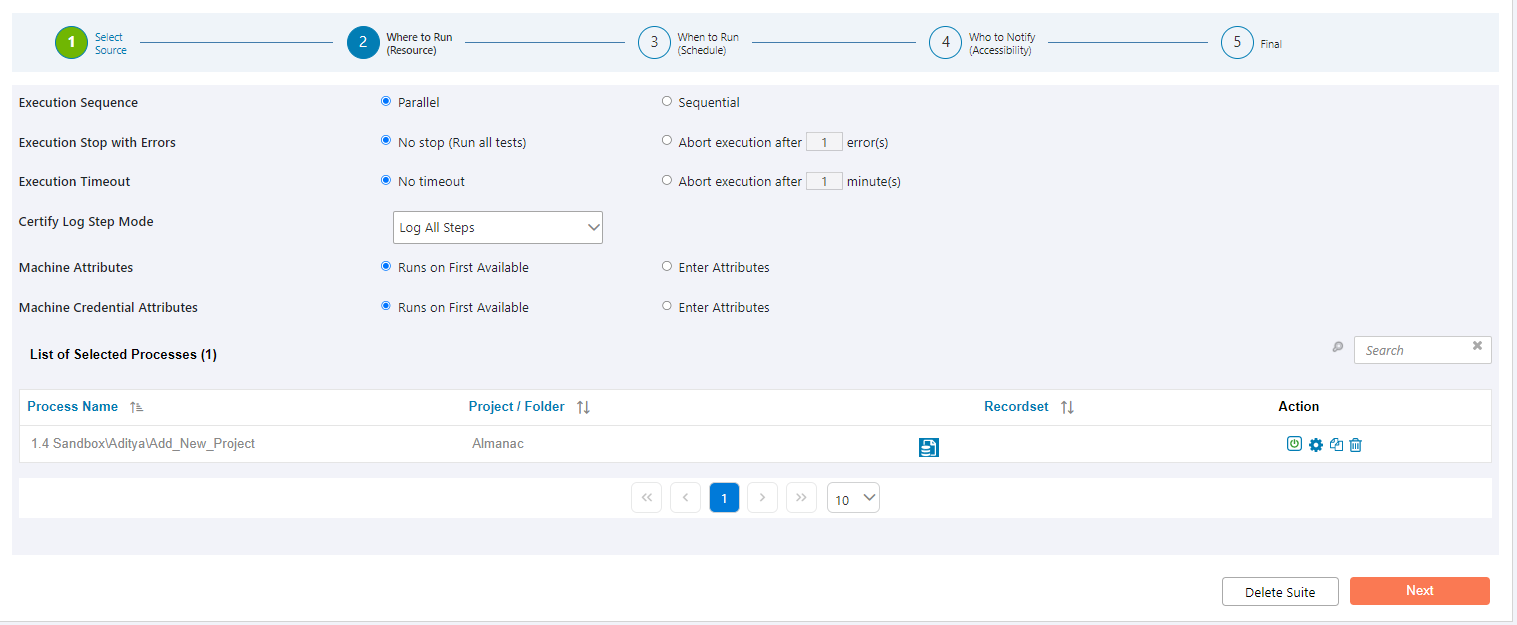
13.Here Specify how you want to conduct your process execution
14.By default below properties appearsas shown in below screenshot
We can configure Resource like
Execution Sequence:
- We can choose Parallel or Sequentialradio button
Execution Stop with Errors:
- If we select No Stop radio button then if scripts will continue execution without stoping.
- If we select Abort execution after, radio button then we can choose after how may failed step we can stop execution
Execution Timeout:
- If we select No timeout radio button, execution does not have time limit
- If we select Abort execution after radio button, we can give time limit for execution, so that within particular time execution not completes then it will stop execution and process will fail.
Certify Log Step Mode :
Select the mode on how you want the steps to be logged:
•Log All Steps – All steps are included in result.
•Log Aborted Steps Only – Only aborted steps are listed in the result.
•Log Failed Steps – Only failed steps are listed in the result.
•Log Process Only – Only the log header and log process tables are included in the result.
•Log Status Only – Only status of result will get.
•Log Disabled – No logging is selected, and all the Result are skipped.
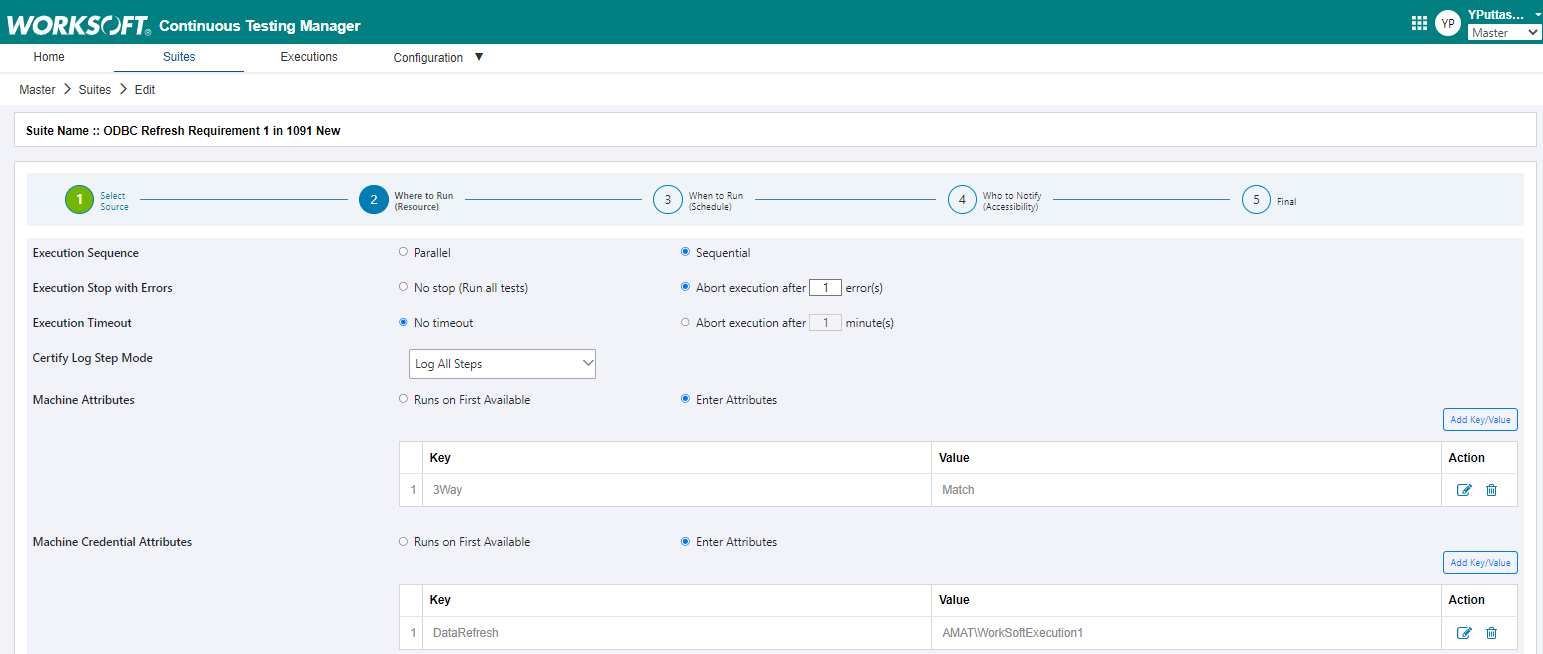
Machine Attributes :
- If we select Runs on First Availableradio button, then it will start execution on random machine which is avaliable.
- If we select Enter Attributes radio button then we can run the selected process in Required machine , by provideing key and value, this can be added ussing by clicking Add key/value button.
Machine Credential Attributes:
- Runs on First Available :
If we select this radio button it will execute on random credentails on Particular machine with different credentails provided.
- Enter Attributes:
If we select this radio button , it will login with the provided credentails if the machine has many credentails avalible.this can be added ussing by clicking Add key/value button.
- We can add recorset, we can arrange the process inSequential order by using List of Selected Processes option.

- Click Next button.The next step is to schedule execution of suite.
To schedule execution of suite:
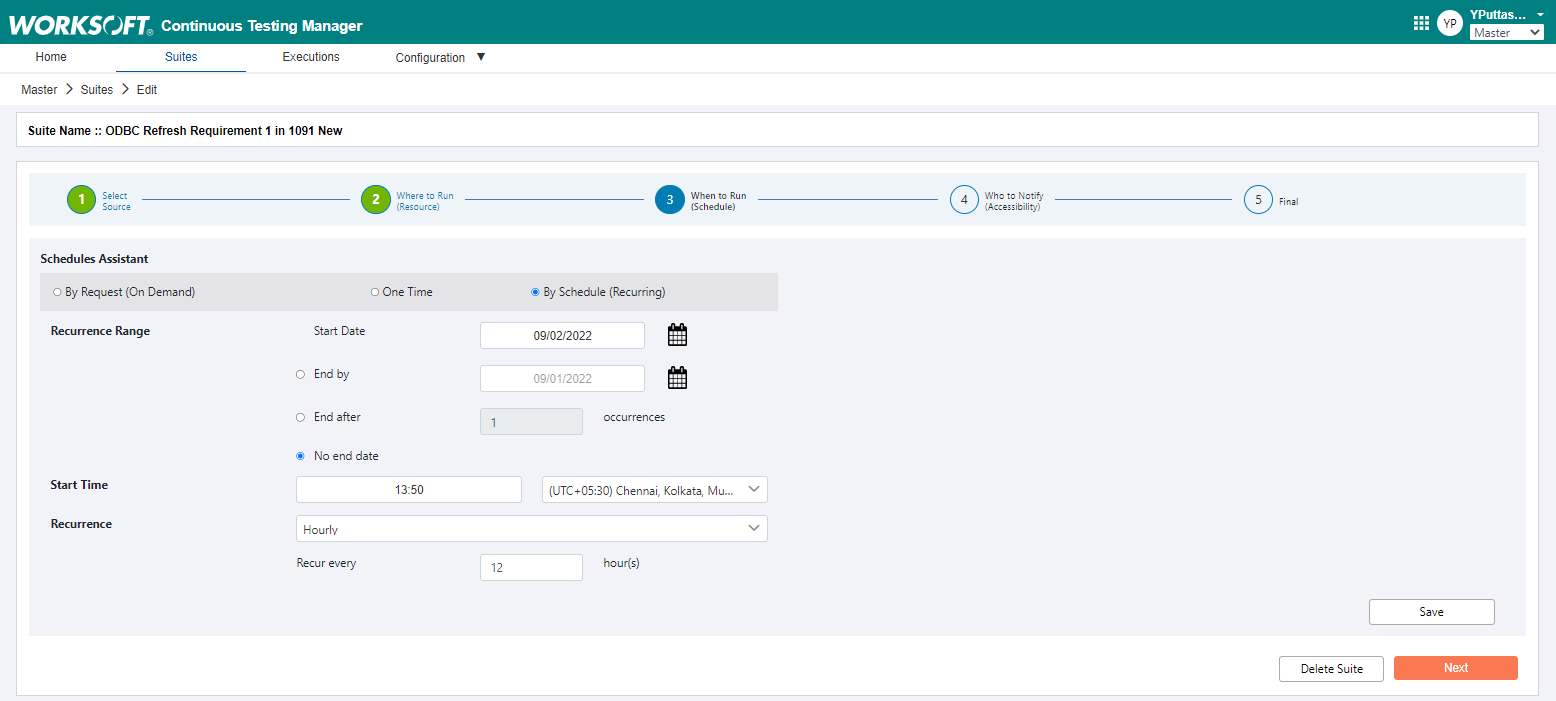
- After clicking Next button, the When to Run (Schedule) screen opens.
- In the Schedules Assistant section, select one of the following options to perform required activity.
By Request (On Demand) :
By selecting this radio button we cannotscheduleexecute suite.You can manually execute the suite after you have completed configuration.
One Time:
This option is used to Schedule the suite to execute one specific time and this is one time activity.
By Schedule (Recurring):
This option is used to trigger execution at specified intervals.
In the Recurrence Range section, we can provide start date,End date and Start time .
From the Recurrence drop-down list, select one of the following:
•Hourly – Enter the amount of hours.
•Daily -Enter the amount of days.
•Weekly -Enter how many times you want to execute in the week. Also, select which days you want to execute the suite.
•Monthly – Enter the day and the number of months.
•Yearly – Enter the amount of years and select the month and day.
Click Save button.
- Then Click on Next button for email notification screen. As shown in below screenshot.
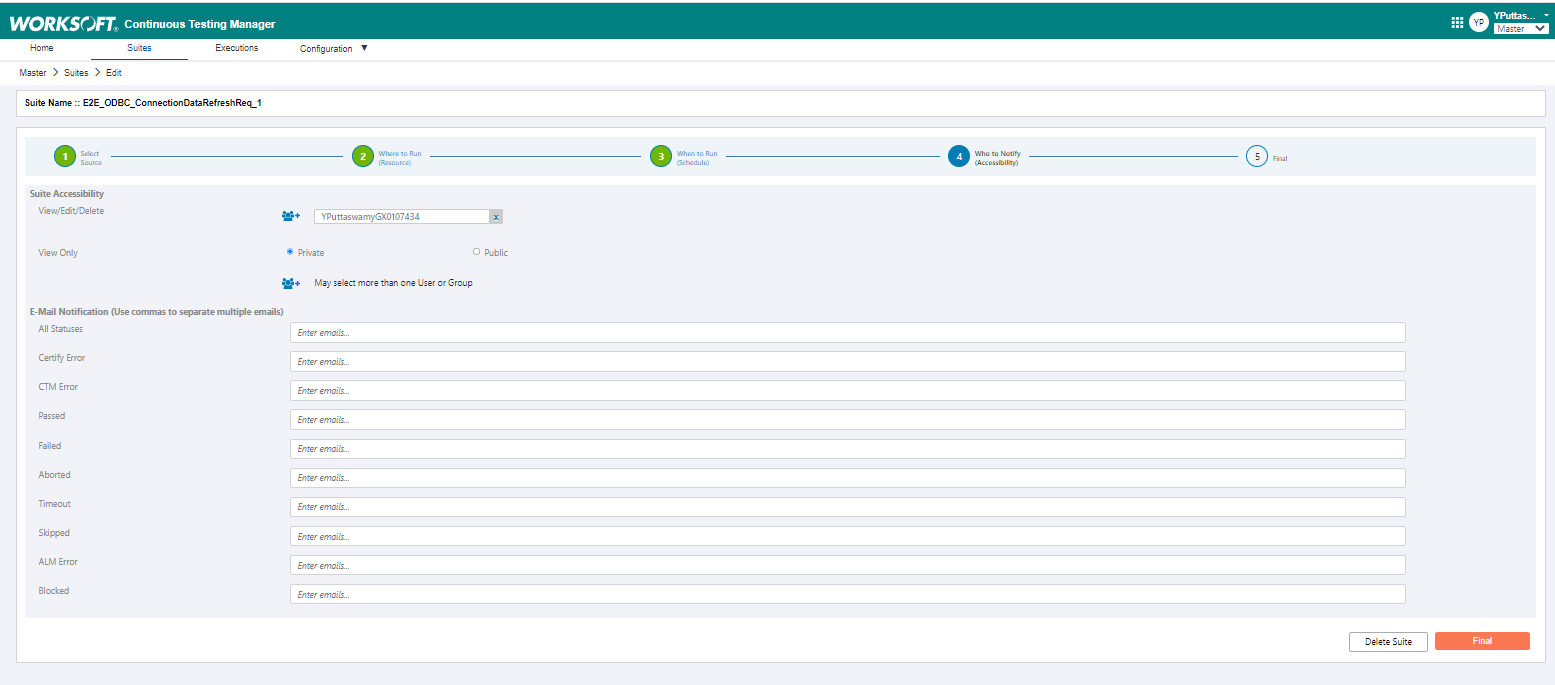
- In the Suite Accessibility section, click the Add User/Group button.
- The Select Users and Groups dialog box opens.
- At least one user or group must be assigned permissions.
- After configuring SMTP in worksoft portal , We can provide required email id to get theexecution status notification.
- If more than one person required mail notification then use commas to separate multiple emails.
- We can get following notification All Statuses,Certify Error,CTM Error,Passed,Failed,Aborted,Timeout,Skipped.
- After providing email id, click on Final button.
- Now completed creating suite and the Final screen opens with the suite summary.
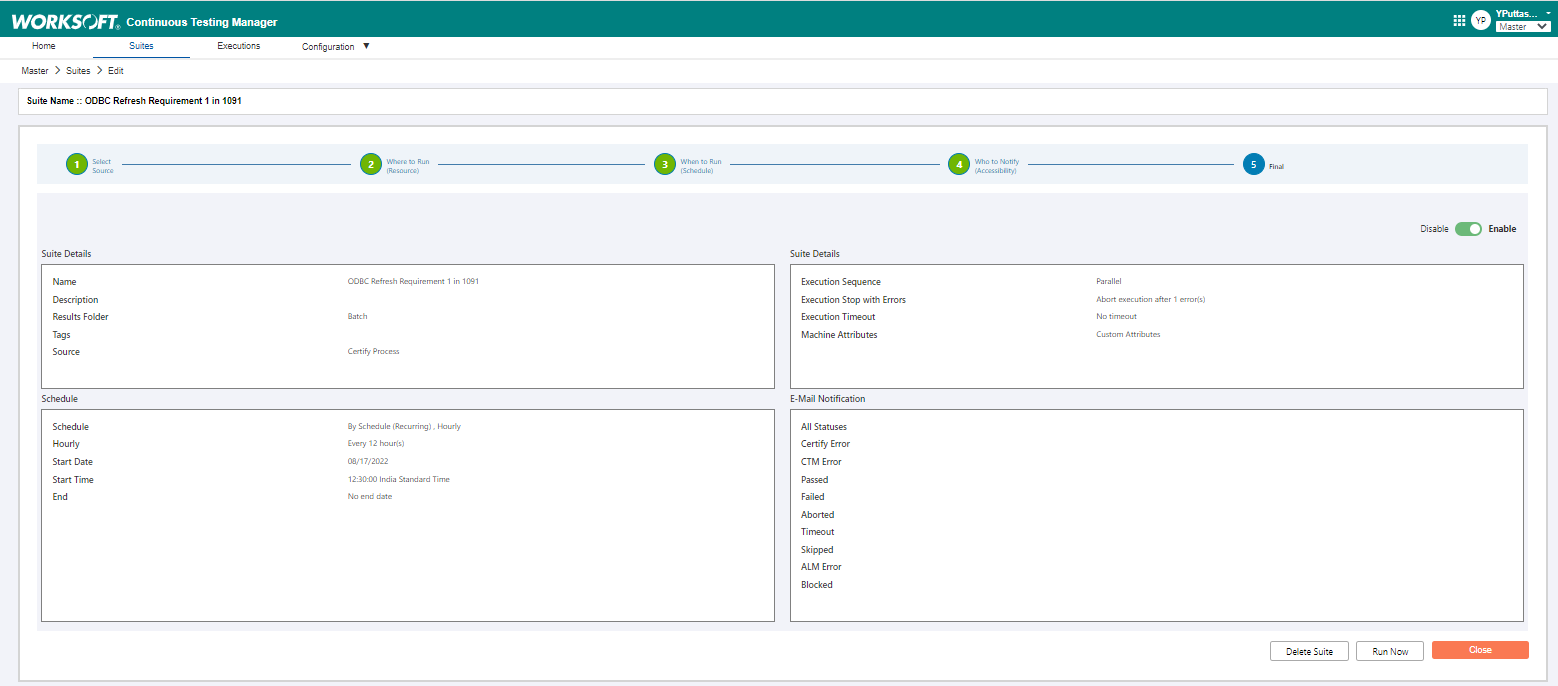
- Click Run Now button to trigger execution and close button to close summary window.
Editing a suite:

In Action column we have options for
- Enable and disable a suite
- To trigger execution
- Edit Suite
- Delete Suite